Car decals offer a fantastic way to personalize your vehicle, showcasing style and creativity! Applying them correctly ensures a professional finish and longevity.
From simple stickers to complex graphics, understanding the process is key to achieving a flawless look. This guide provides detailed car decal instructions.
Whether you’re a first-timer or experienced enthusiast, mastering decal application enhances your vehicle’s aesthetic appeal and protects the paint.
What are Car Decals?
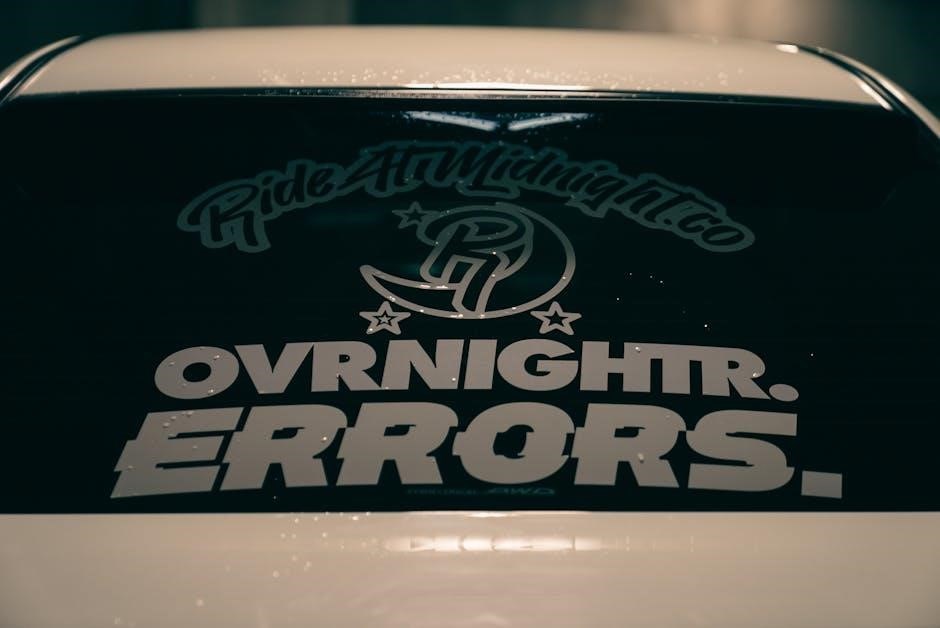
Car decals, often referred to as stickers or vinyl graphics, are adhesive designs applied to the exterior or interior surfaces of vehicles. They range dramatically in complexity, from simple, pre-cut shapes and lettering to intricate, full-color images and custom designs.
These versatile additions are typically crafted from vinyl, a durable and weather-resistant material ideal for automotive use. Vinyl decals can be die-cut, meaning they are cut to the exact shape of the design, or printed on a clear or opaque background.
Essentially, they’re a cost-effective and non-permanent way to personalize your ride, advertise a business, or express your interests. Proper car decal instructions are vital for a lasting, professional appearance.
Why Apply Car Decals?
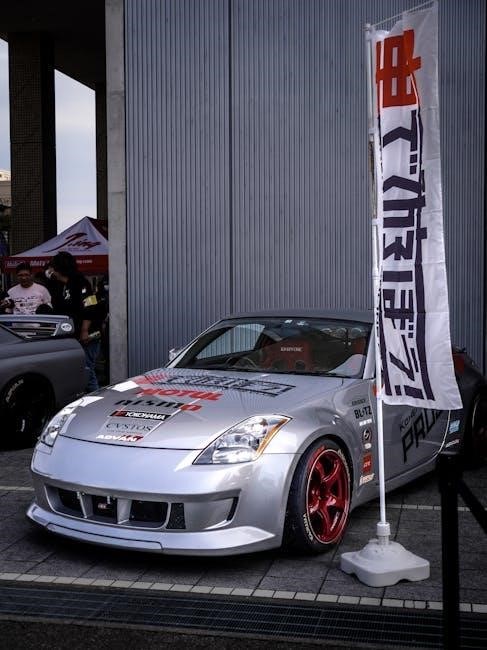
Applying car decals offers a multitude of benefits, primarily centered around personalization and visual impact. They allow vehicle owners to express their individuality, showcasing hobbies, interests, or unique style. Businesses utilize decals for mobile advertising, increasing brand visibility and reaching a wider audience.
Beyond aesthetics and marketing, decals can also serve a protective function, shielding paint from minor scratches and UV damage. They’re a relatively inexpensive way to dramatically alter a vehicle’s appearance without the commitment of a full wrap or paint job.
Following proper car decal instructions ensures a professional finish, maximizing these benefits and ensuring longevity.
Tools and Materials Needed
Successful car decal instructions require specific tools: vinyl decals, cleaning solutions, squeegees, spray bottles, and application tape. Preparation is paramount for a flawless result!
Decal Options: Vinyl vs. Other Materials
When considering car decal instructions, understanding material choices is crucial. Vinyl remains the dominant choice due to its durability, weather resistance, and versatility. It withstands UV rays, rain, and temperature fluctuations, ensuring longevity. Different vinyl grades offer varying lifespans and finishes – cast vinyl is premium, conforming well to curves.
Alternatives like static cling decals are temporary, ideal for short-term promotions or events. However, they lack vinyl’s adhesive strength and durability. Paper decals are even less resilient, quickly fading and deteriorating when exposed to the elements. For lasting customization following car decal instructions, vinyl is the superior option, providing vibrant colors and a professional appearance. Choosing the right vinyl type impacts the final result.
Cleaning Supplies: Essential for Preparation
Following car decal instructions begins with meticulous surface preparation. Essential cleaning supplies include a quality automotive soap, specifically formulated to remove dirt, grime, and road contaminants without damaging the paint. Isopropyl alcohol is vital for eliminating wax, grease, and silicone – residues that hinder adhesion. Microfiber cloths are preferred over abrasive materials to prevent scratches.
A spray bottle for applying the cleaning solution and a soft sponge or wash mitt are also necessary. Avoid household cleaners, as they may contain chemicals harmful to automotive finishes. Thorough cleaning ensures optimal adhesion, preventing bubbles and lifting. Proper preparation, guided by car decal instructions, is paramount for a professional, long-lasting result.
Application Tools: Squeegees, Spray Bottles, and More
Adhering to car decal instructions requires specific tools for a smooth application. A high-quality squeegee, preferably with a felt edge, is crucial for eliminating air bubbles and excess solution. A spray bottle is needed to evenly distribute the application fluid – often a mixture of water and a tiny amount of dish soap.
Masking tape assists with precise decal alignment, while a sharp blade or utility knife facilitates trimming excess vinyl. Microfiber towels are essential for wiping away residue. Having a heat gun or hairdryer can aid in conforming the decal to curved surfaces. Following these car decal instructions and gathering the right tools guarantees a professional finish.

Preparation is Key
Car decal instructions emphasize thorough preparation! Cleaning, inspecting, and considering temperature are vital steps. A pristine surface ensures optimal adhesion and a lasting, professional result.
Surface Cleaning: Removing Dirt, Wax, and Grease
Car decal instructions universally stress the importance of a meticulously clean surface. Begin by washing the application area with automotive soap and water, removing loose dirt and debris. Following this, a dedicated wax and grease remover is crucial.
Existing wax layers prevent proper adhesion, leading to peeling or bubbling. Thoroughly apply the remover, following the product’s directions, and wipe clean with a microfiber cloth. Ensure no residue remains, as even trace amounts of contaminants can compromise the decal’s bond.
Isopropyl alcohol can also be used for a final wipe-down, guaranteeing a completely clean and prepared surface. This diligent cleaning process is foundational for a successful and long-lasting decal application.
Surface Inspection: Identifying Imperfections
Car decal instructions emphasize a thorough surface inspection after cleaning. Carefully examine the application area for any imperfections – scratches, dents, or existing damage. These flaws can affect the decal’s appearance and adhesion. Minor scratches might be less noticeable, but deeper imperfections could cause the decal to lift or wrinkle over time.
Feel the surface; even seemingly smooth areas can have subtle bumps. Addressing these issues before application is vital. Lightly sanding minor imperfections can create a more uniform surface. Remember, the decal will accentuate any existing flaws, so preparation is key.
A flawless application starts with a flawless foundation, ensuring a professional and long-lasting result.
Temperature Considerations: Ideal Application Weather
Car decal instructions consistently highlight the importance of temperature. Optimal application occurs between 50°F and 85°F (10°C ⎯ 29°C). Avoid applying decals in direct sunlight, as the heat can cause the adhesive to activate prematurely, leading to bubbling or poor adhesion. Cold temperatures can make the vinyl brittle and difficult to work with.
Humidity also plays a role; moderate humidity is preferable to extremely dry conditions. Wind can introduce dust and debris, compromising a clean application. Ideally, choose a shaded, calm day for the best results.
Paying attention to these factors significantly increases the chances of a smooth, professional-looking decal installation.

Wet Application Method – Detailed Steps
Car decal instructions for wet application involve spraying a soapy water solution onto the vehicle and decal, allowing for repositioning and bubble removal.
This method ensures a smooth, bubble-free finish, making it ideal for larger or more complex designs.
Step 1: Preparing the Application Solution
Car decal instructions begin with creating the perfect application solution! This isn’t just water; it’s a carefully balanced mixture designed to allow the decal to float and be easily positioned. The standard ratio is approximately 1-2 teaspoons of mild dish soap per quart of water.
Avoid using harsh detergents or cleaners, as these can damage the decal’s adhesive or the vehicle’s paint. Gently mix the solution, avoiding excessive bubbles. The goal is a slippery, lubricating layer, not a foamy mess. Some installers also add a tiny amount of baby shampoo for enhanced slip.
Pour the solution into a clean spray bottle – a dedicated one is best to prevent contamination. Thoroughly test the solution on an inconspicuous area of your vehicle to ensure compatibility before widespread use. This proactive step safeguards against potential paint damage.
Step 2: Applying the Solution to the Vehicle Surface
Following car decal instructions, generously spray the prepared application solution onto the area where the decal will be placed. Ensure complete and even coverage; don’t be shy! The surface should be visibly wet, allowing the decal to move freely during positioning. This step is crucial for preventing air bubbles and wrinkles.
Work in sections, especially on larger surfaces, to prevent the solution from drying too quickly. Re-apply as needed to maintain a consistently slick surface. Avoid applying the solution in direct sunlight, as it will evaporate rapidly. The goal is a wet, lubricated surface that allows for easy decal manipulation.
Remember, the solution acts as a temporary adhesive, enabling adjustments before the decal fully adheres.
Step 3: Positioning the Decal
Following car decal instructions, carefully peel the decal away from its backing paper. With the vehicle surface thoroughly coated in application solution, gently position the decal onto the wet area. Take your time and ensure accurate alignment – this is where precision matters! Use a reference point or masking tape to guide placement.
Don’t worry if it’s not perfect yet; the solution allows for adjustments. You can gently slide the decal around to achieve the desired position. Avoid pressing down firmly at this stage, as it will cause the decal to adhere prematurely. Maintain a light touch and focus on overall alignment before proceeding.
Visualize the final result and make any necessary corrections now.
Step 4: Squeegeeing Out Water and Air Bubbles
Following car decal instructions, once the decal is positioned correctly, it’s time to remove the water and air bubbles. Using a squeegee, apply firm, even pressure, starting from the center and working outwards. Overlap each pass slightly to ensure complete coverage. The goal is to force the solution out from under the decal, creating a strong bond with the vehicle surface.
Work slowly and methodically, paying close attention to edges and corners. If you encounter air bubbles, gently squeegee towards them. Avoid excessive pressure, which could damage the decal. For stubborn bubbles, a pinprick can release the air, followed by gentle squeegeeing.
Continue until all water and air are removed.
Step 5: Removing Excess Water and Solution
Following car decal instructions, after squeegeeing, excess water and application solution will remain around the decal’s edges. Use a clean, lint-free microfiber towel to carefully wipe away this residue. Gently blot, rather than rub, to avoid disturbing the newly applied decal. Pay attention to the corners and contours where solution tends to accumulate.
Inspect the decal closely for any remaining bubbles or areas where the solution hasn’t been fully removed. A second, lighter pass with the squeegee can help. Ensure all traces of the solution are gone to prevent streaking or hazing as it dries.
Allow the decal to fully dry before proceeding.

Dry Application Method – Detailed Steps
Car decal instructions for dry application involve precise alignment and careful smoothing. This method is ideal for smaller decals and requires a steady hand for bubble-free results!
It’s a straightforward process, perfect for those seeking a quick and efficient way to personalize their vehicles.
Step 1: Peeling the Backing Paper
Car decal instructions begin with carefully peeling the backing paper away from the adhesive vinyl. This is a crucial step, demanding patience and a delicate touch to prevent tearing or folding the decal itself. Start at one corner, applying gentle, consistent pressure as you slowly separate the paper.
Avoid rushing this process; a slow and steady approach minimizes the risk of errors. If the decal begins to lift with the backing paper, gently use a squeegee or plastic card to help separate it. Some decals have a transfer tape layer – ensure you’re peeling the correct backing!
As you peel, keep the decal flat and supported to avoid wrinkles or creases. A clean, flat surface is essential for this stage. Prepare to immediately proceed to alignment and application once the backing is removed.
Step 2: Aligning and Applying the Decal
Following car decal instructions, carefully position the peeled decal onto the desired location on your vehicle. Precise alignment is key, so take your time and double-check before making contact. Use masking tape to temporarily secure the decal in place, ensuring it’s perfectly aligned with your intended design.
Once satisfied with the positioning, begin gently applying the decal to the surface, starting from one edge. Gradually work your way across, maintaining consistent pressure. Avoid pressing down firmly until you’re confident in the alignment, allowing for minor adjustments if needed.
Remember, a steady hand and careful observation are vital for a professional-looking result. This step sets the foundation for a bubble-free and lasting application.
Step 3: Smoothing Out Air Bubbles
Following car decal instructions, utilize a squeegee to effectively eliminate any trapped air bubbles. Begin at the center of the decal and work outwards in a firm, even motion. Apply consistent pressure, overlapping each pass slightly to ensure complete coverage. This process forces air outwards, creating a smooth, seamless application.
If stubborn bubbles persist, try gently pricking them with a pin and then smoothing the area with the squeegee. Avoid excessive force, as this could damage the decal. Patience is crucial; continue working the squeegee until all air bubbles are removed, resulting in a professional finish.
Remember, a bubble-free application enhances the decal’s appearance and longevity.
Troubleshooting Common Issues
Car decal instructions often require problem-solving! Air bubbles, wrinkles, and lifting are common. Careful attention and gentle techniques can resolve these issues effectively.
Addressing these promptly ensures a polished, long-lasting result for your vehicle’s customized appearance.
Dealing with Air Bubbles
Car decal instructions frequently mention air bubbles – a common frustration during application. Small bubbles often disappear within 24-48 hours as the adhesive fully settles. However, larger bubbles require immediate attention.
Using a squeegee, firmly but gently work from the center of the bubble outwards towards the edges. Avoid excessive pressure, which could damage the vinyl. If the bubble persists, a tiny pinprick can be made with a needle, allowing the air to escape, followed by careful smoothing with the squeegee.
Applying a bit more application solution around the bubble before squeegeeing can also help. Remember, patience is key! Multiple passes with the squeegee, combined with gentle pressure, usually resolves the issue, ensuring a flawless finish according to car decal instructions.
Fixing Wrinkles and Creases
Car decal instructions often address wrinkles and creases, which can occur during application, especially with larger decals. Gentle heat is your ally here. A hairdryer, set to low heat, can be used to soften the vinyl, making it more pliable.
Apply heat in sweeping motions, avoiding prolonged exposure to any single spot. Simultaneously, use a squeegee to gently smooth out the wrinkles, working from the center outwards. The heat reactivates the adhesive, allowing it to conform to the vehicle’s surface.
Be cautious not to overheat the vinyl, as this could cause damage. Following these car decal instructions carefully will result in a smooth, professional-looking application.
Addressing Decal Lifting
Car decal instructions frequently cover decal lifting, a common issue caused by inadequate surface preparation or application. If edges begin to lift, carefully peel back the affected area. Thoroughly clean both the decal’s underside and the vehicle’s surface with isopropyl alcohol to remove any contaminants.
Reapply a light mist of application solution (if using the wet method) or gently heat the area with a hairdryer to reactivate the adhesive. Firmly squeegee the decal back into place, ensuring complete contact.
Following these car decal instructions diligently minimizes lifting. For persistent lifting, consider a stronger adhesive specifically designed for automotive vinyl.

Decal Care and Maintenance
Car decal instructions emphasize regular washing with mild soap and water to preserve vibrancy. Protect decals from harsh UV rays with wax or sealant!
Proper care extends decal life, maintaining a stunning appearance for years to come.
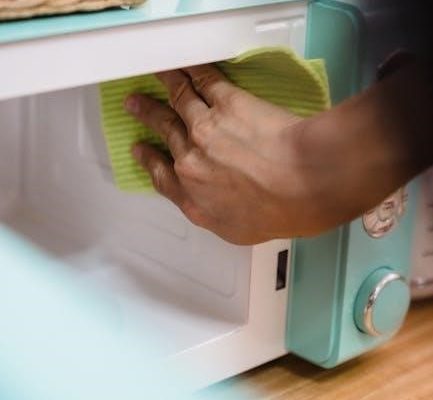
Washing Your Vehicle with Decals
Car decal instructions consistently recommend gentle washing techniques to safeguard your vehicle’s decals. Always opt for pH-neutral car wash soap, avoiding abrasive cleaners or harsh chemicals that can lift edges or fade colors.
Utilize a soft microfiber wash mitt, applying gentle pressure in straight lines, rather than circular motions, to minimize friction. Rinse thoroughly with cool water, ensuring all soap residue is removed.
Avoid high-pressure washers directly aimed at the decals, as this can cause peeling. When drying, use a clean, soft microfiber towel, blotting instead of rubbing. Regular washing prevents dirt and grime buildup, preserving the decal’s adhesion and visual appeal. Consider applying a sealant or wax after washing to provide an extra layer of protection against the elements.
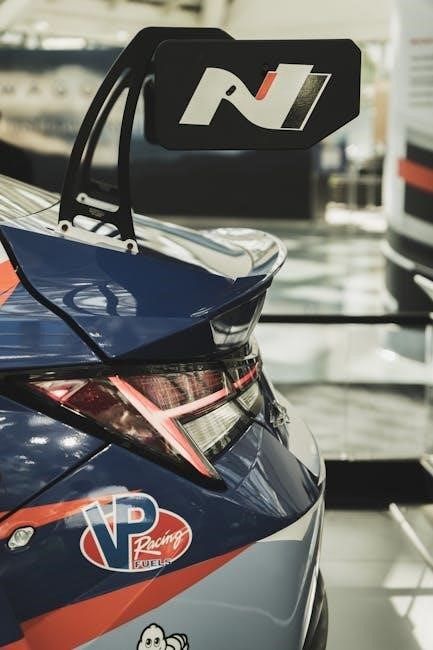
Protecting Decals from UV Damage
Car decal instructions emphasize the importance of UV protection to maintain vibrant colors and prevent fading. Prolonged sun exposure can significantly degrade vinyl decals, causing them to crack, peel, or lose their adhesive properties.
Regular application of a UV-protective sealant or wax specifically designed for automotive finishes is crucial. These products create a barrier against harmful UV rays, extending the decal’s lifespan. Parking in shaded areas or using a car cover whenever possible further minimizes exposure.
Consider decals manufactured with UV-resistant inks and laminates for enhanced durability. Periodic inspection for signs of UV damage, such as color fading or edge lifting, allows for timely intervention and potential replacement.
Decal Removal Techniques
Car decal instructions often overlook removal, but it’s a vital skill! Avoid harsh scraping, which can damage your vehicle’s paint; Gentle heat is your ally; a hairdryer softens the adhesive, making peeling easier. Start at a corner and slowly lift, applying consistent heat as you go.
If adhesive residue remains, use a dedicated adhesive remover specifically formulated for automotive paint. Avoid solvents like acetone, which can cause damage. Apply the remover, let it dwell briefly, and gently wipe away the residue with a microfiber cloth.
Thorough cleaning after removal ensures a pristine surface for future decals or simply a clean look. Patience is key for a flawless, paint-safe removal process!

Advanced Techniques
Car decal instructions expand with larger formats and layered designs! Precise alignment and sectioning are crucial for complex graphics; Patience and a skilled hand deliver stunning results.
Mastering these techniques elevates customization, creating truly unique vehicle aesthetics.
Applying Large Format Decals
Car decal instructions for large formats demand a team approach for optimal control. Begin by thoroughly cleaning the vehicle surface, ensuring it’s free of contaminants. Section the decal into manageable strips, numbering them for correct reassembly.
Apply the initial section using the wet method, carefully squeegeeing out air bubbles and solution. Gradually apply subsequent sections, overlapping slightly for a seamless transition. Constant communication between team members is vital for maintaining alignment.
Utilize a soft cloth to wipe away excess solution, revealing the complete design. For curved surfaces, gentle heat from a heat gun can aid in conforming the decal. Remember, patience and precision are paramount when tackling large-scale applications!
Layering Decals for Complex Designs
Car decal instructions for layered designs require meticulous planning and execution. Start with the base layer, applying it flawlessly as a foundation. Precise alignment is crucial; use masking tape to temporarily secure edges. Subsequent layers should complement the base, building the desired complexity.
When applying each layer, utilize the wet method for repositioning flexibility. Gently squeegee, removing air bubbles and ensuring adhesion. Pay close attention to overlapping areas, striving for seamless integration. Consider using a cutting mat to pre-assemble sections before final application.
A heat gun can aid in conforming layers to curves, but use caution to avoid lifting. Patience is key – complex designs demand time and precision for a professional finish!

Resources and Further Learning
Car decal instructions are readily available online through tutorials and videos. Professional installation services offer expertise for complex projects and flawless results!
Explore online forums and communities for tips, tricks, and shared experiences from fellow enthusiasts.
Online Tutorials and Videos
Numerous online resources demonstrate car decal instructions through visual guides. Platforms like YouTube host a wealth of videos, showcasing both wet and dry application methods. These tutorials often feature step-by-step demonstrations, covering everything from surface preparation to bubble removal.
Specifically, videos demonstrate how to use a Cameo Silhouette cutter for creating custom decals, and Unreel Extreme Custom Decals provides instructional content. Searching for “vinyl decal application” or “car sticker installation” yields a diverse range of results.
Many tutorials emphasize the importance of proper cleaning and squeegeeing techniques. They also address common issues like wrinkles and lifting, offering practical solutions. These resources are invaluable for visual learners and those seeking a clearer understanding of the process.
Professional Decal Installation Services
For those seeking a flawless finish or dealing with large, complex car decal instructions, professional installation services are an excellent option. Experts possess the skills and tools to ensure precise application, minimizing the risk of bubbles, wrinkles, or lifting.
These services are particularly beneficial for intricate designs, full vehicle wraps, or decals applied to curved surfaces. Professionals meticulously prepare the surface, ensuring optimal adhesion and longevity. They also offer guidance on decal material selection and design placement.
While DIY application is achievable, professional installation guarantees a high-quality result, saving time and potential frustration. Searching online for “car decal installers” or “vinyl wrap shops” will reveal local options.